Showing posts with label how i do. Show all posts

Philly SmugMug Meetup: Using Ambient Light for Portraits

Oh my gosh.  I haven't blogged in forever!  I'm going to get back into it now, my apologies!

Last Saturday, one of my photo groups, Philly SmugMug, had a meetup in the Art Museum area and we focused on ambient light.  It was a cloudy day which to many photographers is a dream come true hahahaha!  I think it's great as well, but depending on the location, it can get a bit drab.  That coupled with a security guard telling us to clear the Waterworks area pushed us to venture out and see what else we could find.  There were 5 mini groups and I was the leader of one of them, yay for Group 3!!

We had this brilliant idea for Ahmad to stand on a narrow ledge on this gym building...

 ... But we couldn't get him to turn around HAHAHAHAH!  And then someone from inside the gym told him to get down b/c everyone inside could see him LOL!!!!  That was fun!!


Personally, I was looking for directional light and that was definitely a challenge with a gray sky and tons of soft flat light everywhere.  But as we walked toward Boat House Row, we found some overhangs which gave me the shadows and depth I was looking for.


Worked a bit on framing!
 
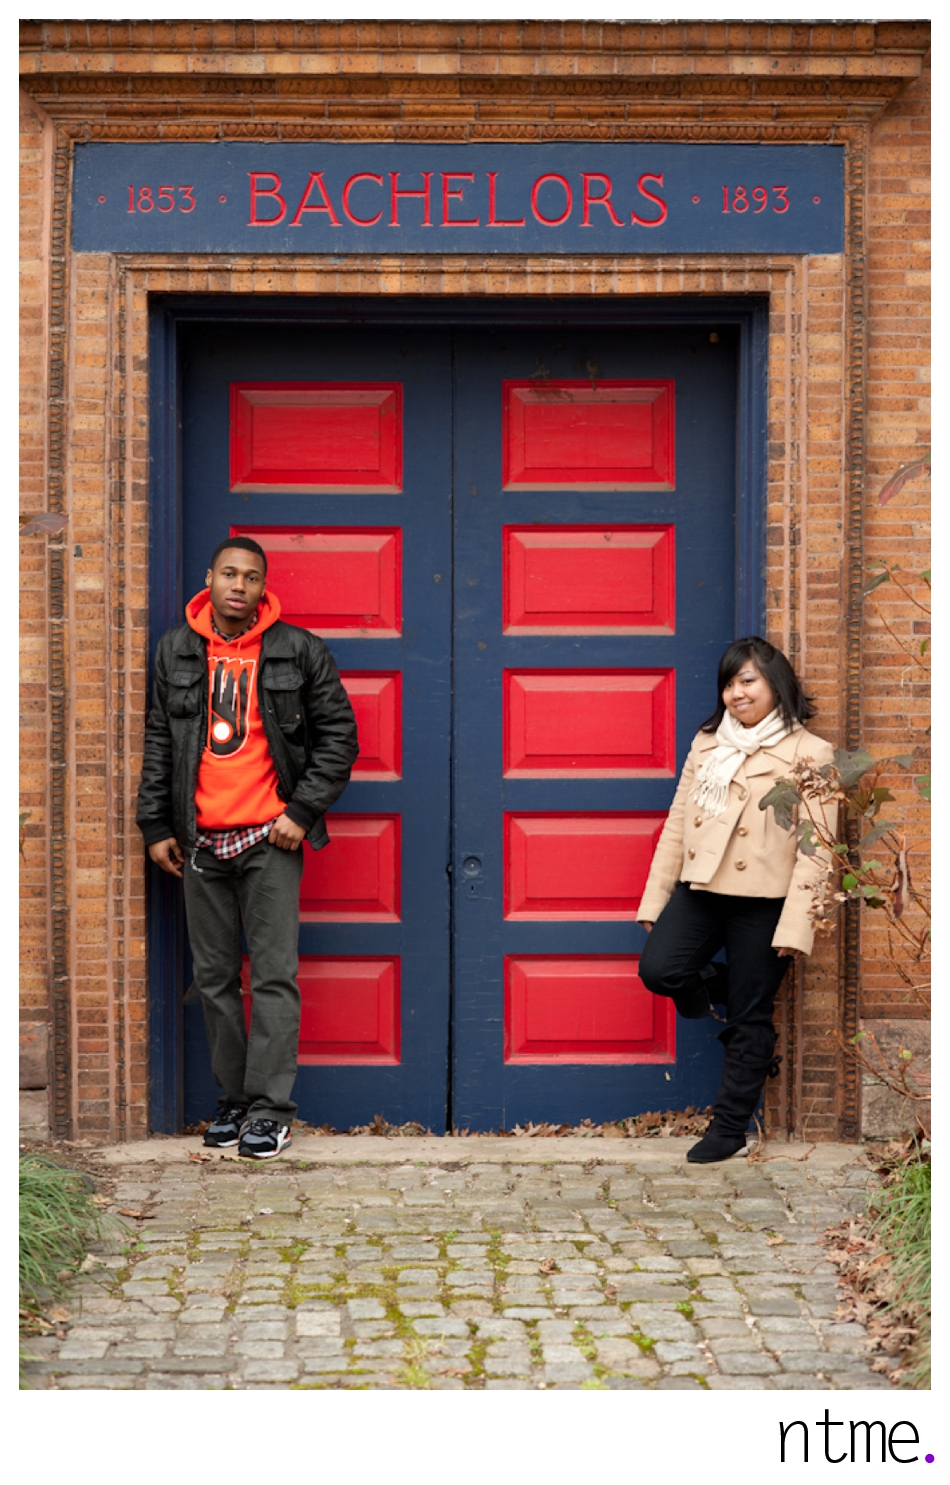
 Best friends!!


Boat House Row was so colorful!  Glad we took a walk!!

Do you remember JP from when he graduated and I took his pics? Well, he's back HAHAHA!!  Holler ladies!! LOL!


So yeah, this was a lot of fun and I'm thankful to all my friends for helping me out by modeling or being photo assistants!!  It really helps so much as I continue to hone my craft!!  And a big thanks to my fellow photogs in Philly SmugMug group, it's always fun!!  

I really enjoy doing what I do!


How I Do: Ring Shots while Testing Nikon's 105mm f/2.8 Micro Lens!

Over the weekend I rented a Nikon 105mm f/2.8G ED-IF AF-S VR Micro-Nikkor Lens from LensRentals.com.  Their review about it explicitly warns that once you try it you will want to keep it.  It was so hard for me to ship it back yesterday because I did want to keep it.  I currently use the 60mm f/2.8 from Nikon for my macro shots and while that is great, the compression on the 105mm just is so awesome.  I definitely can see the benefit of having 45 extra mm hehehe!  You are also less likely to be in the way of your own light and such.  I feel like it's a lot easier to get a super big shot of a ring if you'd like it to fill the frame as well... or at least you don't have to do as much cropping in post compared to the 60mm. :)  

It's currently around $900 bucks and if it weren't for the fact that I'm saving up for the D4, I'd totally snatch it up.  But for now, at least I can rent it when I do weddings :)  I always suggest renting a lens first before buying it so you can really see if you have a need for it! 

Here's some shots of my own wedding ring taken with the 105mm - if you get a chance, rent it and try it out too!!
 

All of these were taken using items in my kitchen LOL.  
Window light was coming in directly to the left of the kitchen table.

Here's what I had at my disposal:
- banana tree
- big fake diamond paperweight
- water bottles
- laptop cooler (the black thingy) 
Note:  I started out with auto focus, but quickly switched to manual.  Auto is good in some respects, for the 105mm it's very fast, but sometimes it couldn't pick up what I wanted to be in focus since my ring is a bit ... elaborate and sometimes I wanted to the bigger diamond in focus but other times I wanted the side diamonds to be focused.


So.. when I started, I felt the shots were decent but.. nothing was like wow to me:

The bokeh in this first one is the water bottles, although it almost looks like.. the background could be a window with storefronts showing through or something.. at least in my mind lol.


ISO 1600, f/9, 1/60 sec

Then I tried getting some leading line action in... 

 ISO 1600, f/9, 1/125 sec

Eh, it's okay, it's a start hehe! 
I took a minute to rethink things and do some rearranging.


 This one is the banana tree hook with bokeh from its own wooden stand and I think there's a little brown candle box behind the stand as well.  

ISO 800, f/5.6, 1/160 sec


This is my ring on my laptop's fan cooler.. with the big fake diamond paperweight serving as a reflective surface. 


ISO 1600, f/7.1, 1/100 sec

 This is the banana tree's hook with the big fake diamond paperweight serving as bokeh.  I had to move the diamond around to make sure it caught the window light correctly to produce the different colors.


ISO 1600, f/7.1, 1/125 sec

As you can see, although the kitchen had a decent amount of light flowing in, the backgrounds seem to be rather black in the latter images.  It has to do with light falloff.  I'm not going to botch an explanation but basically, I placed my background items further back from the light source, and as a result, the light captured in the background by the camera tapers off dramatically.  Also I was shooting at f/7.1 or higher for most of the pics.

So I'm happy with getting from where I started to where I ended up.  I think that you can definitely find ways to turn something ordinary into something extraordinary.  Not that I'm winning awards or anything but I am happy with what I was able to do with things I found in my kitchen hehehe!

I love the 105mm 2.8 for ring shots.  I definitely see myself renting this for my upcoming weddings.  

Hope my thought process didn't bore you too much hehe!

Teaser: Photographer Tip + Mini Session - Domingo Family

Yesterday I did a mini session with the Domingo family.  It was moreso for formal images which I will not be posting, but here is one of the informal images, a father and son moment :)  A few more to come when I'm done editing!

Photographer Insider Info:
This is just window light which I shaped with the curtains.  AND they are just sitting on the floor in an office.  But, you can't tell, can you?  You can shoot just about anywhere - really, you can.


Talking Shop: Philly SmugMug Meeting - Using Your Camera 101

Okay look guys, I'll tell you straight up.

I'm not gonna lie - I like blogging on here a LOT more now that I've redesigned it HAHAHAHAH!  4 days of blogging in a row - unheard of!  But I will definitely try to blog more consistently from here on in!

Anyway, so yesterday, the Philly SmugMug Meetup Group held a meeting in Calumet of Philadelphia, a photography store which I shop at regularly!  Thank you to Calumet for opening your classroom to us, to my photo buddy Hillary for dealing with all the logistics of coordinating with Calumet, and for SmugMug for allowing us to have this meeting :)

Fred and I gave a brief and hopefully educational introduction on the essential ingredients for obtaining a proper exposure.  It was my first time to ever do a presentation like this in front of... PEOPLE... I'm used to informally helping out and such, but everyone was nice and tolerant of me and my corny jokes, so I think it went pretty swell!  After the overview, we broke down into smaller groups to tackle questions and just talk about our love for photography!

Below are some pictures we took during the meeting, but you can view more HERE.  And if you're in the Philadelphia area, feel free to join our Philly SmugMug group - it's great way to meet other photographers and share knowledge!

First here are a few pics from my photo buddy - Hillary!  Thanks for sharing!!


Apparently I'm very animated - Fred's looking at me funny as well HAHAHAHAH!!


My partner in crime :)


The next few were our 'live' (lol) demonstration on how sometimes our in-camera meter will not give us an accurate exposure.  

The camera meter has been fooled! My hubby is underexposed a little bit!! Oh no!!

When we are reading our camera meter, zeroing it out isn't always going to work if a scene is brighter than 18% grey. "Go back where we came from = go back towards the brightness (+) and expose longer!" The whites are more white instead of grey!  Yay! Excuse the off WB, just no time for that right now LOL!

Now let's take a darker scene..

Oh no! The camera meter told me this exposure would work, but I am overexposed!! The blacks are grey b/c that's what the camera wanted to do = turn me & my surroundings into 18% grey by overexposing!

Take THAT, inaccurate camera meter! We'll show you who's boss, by dialing back towards the (-) side as we look at our camera meter, exposing a little shorter (faster shutter speed) in order to make my black shirt black again!


Now let's break into smaller groups :)


Here's one from my other photo buddy - Dan!!  
His caption for this: Hi my name is Natasha, and, I'm addicted to ... photography :)
HAHAHAH!


And there you have it!! Wedding tomorrow and Poconos and Niagara after that!!

How I Do: Using Flash Indoors (Chapel)

So... a couple of weeks ago I talked about giving your outdoor images more 'umph' by using flash.  This time let me talk about using flash inside of a chapel.  This isn't always going to be the case, but at least I can give you an idea of how I do it and the difference it can make.

Below is an image made with available light inside a chapel that has both flourescent and tungsten lighting.  It's decent, but it's hard to find WB in such a setting with multiple types of light lol.  I believe I went more with tungsten WB in camera and then played with it a bit more in post.

Decent image, but not a wow image right? Still, a good starting point and a solid image to deliver to a client :)


But look at what happens when you add flash in this situation.  It almost puts a spotlight on them.  I definitely prefer this to the first image.

So how was it done?  Same formula as for outside.  For the record, I don't use gels.  Maybe one day, but I like the warmth that the tungsten gives off when I set my camera to Flash White Balance.

1) Expose for the background. 
If you want it to be darker, speed up the shutter speed, just remember to account for your flash sync speed.  I was at f/4, with a shutter of 1/250, ISO 2000.

For the whole ceremony, I was at ISO 2000 b/c I wanted my shutter speed to be high enough to avoid camera shake using the available light.  So I just kept the same settings here for ease. I could have also lowered the ISO for these portraits, which would consequently slow down the shutter speed and have gotten the same result.  I would just have needed more flash power, which is not a problem with my trusty Quantum T5D-R or whatever it's called.

Do you see the relationship here between ISO, shutter speed, and flash power?  

Higher ISO = Faster Shutter speed (since camera becomes more sensitive to light) = Less Flash Power Needed.

Lower ISO = Slower Shutter Speed (camera less sensitive to the light, so gotta keep shutter open longer) = MORE Flash Power needed in that same situation.

Aperture is kind of arbitrary.. at least to me (omgosh, don't take my word as truth okay?).  It's at f/4 in this case b/c.. that's the aperture that accompanied my 1/250 shutter to get my background to be the way I wanted it to be...  I usually start at 1/250 and then adjust my aperture accordingly.  But honestly, it depends on the situation you are in.. how bright or dim the ambient light is... it's just something you get with time.  Sometimes I'm at 1/60th at like ISO 800.  It just really depends.  And I'm STILL figuring it out LOL.

Am I confusing?  If so, I apologize in advance, AND I suggest you no longer read my 'How To's" LOL.

2)  Light your subject!
Assuming you darken the environment a bit for more dramatics, your subjects will also be dark.  So.. now that it's time to add flash, I do it manually since I'm using off camera flash.  I don't care for TTL at this juncture, I just eyeball it.. and feel it's the easiest way to learn anyway.  I start at around 1/8 power on my flash and.. if it's too bright.. I'll lower it.. if it's too dark still, I'll raise it.  Simple as that!


Hope that helps ... someone out there.. somewhere! :)

How I Do: Using Flash to Give Your Image More "Umph"

So I'm going to blog really quickly since I would like to blog more regularly (I keep saying that, don't I?).  That doesn't explain why I need to blog quickly though.  Today is just a hectic Monday, several albums to design and stuff, but it's great to be busy, that's for sure!

I just wanted to give you an example of how adding flash can give your image more umph when used correctly.

Below is an available light image.  80mm, f/2.8, ISO 200, 1/400 sec.  This image never went to the client because to me, it's lacking something.  The background for one is overexposed and the subjects are too dark.  Sure, I could work some photoshop magic, but to me, that's an extra step I shouldn't have to take in the first place.  I strive very hard to get my images right in camera, so that when it's time to edit, all I have to do is 'enhance' and not to 'fix.'  It's been a long process getting to this point, but I think it's helped me to improve in my craft, and I still am striving to learn as much as I can :)


After taking the above image to assess the lighting (and we'll say that it was also for the purposes of this mini tutorial LOL) I knew that available light was not going to cut it.  I immediately set my shutter to sync speed for flash (1/250 on my D700), and went to work on exposing the background correctly.

Here's the next image I took, ISO 200, 112mm, f/5.6, 1/250.   First thing I did was set my shutter to 1/250 like I said above.  Then I adjusted the f-stop to a point where I got my background to be the way I liked (kind of on the darker side).  Then I added the flash on the couple and adjusted that until they were properly lit as well (I told my husband whether to raise or decrease the power).

So, first expose for the background to get it to look the way you want, then add the flash to light up the subject and adjust that until it's how you want as well.  Remember, assuming nothing is really in close proximity to your subject, the flash only affects your subject and the background is affected only by the ambient available light.   This isn't always the case (such as if the background is RIGHT behind the subject, etc...) but in general when doing environmental portraits, this is what I think of in my head when I do these shots.

Here's a pic behind the scenes (well, not in this exact location, but just to give you an idea where my assistant aka my husband stands).  Usually a 45 degree or so from my camera position, but sometimes less if I have to be careful about shadows.


I don't know about you, but to me, the one with flash looks 10xs better, at least in this type of situation!


Okay gotta go, sorry if this is semi repetitive, but I'll do some more intense how-to's in a bit, I promise!

Oooo I just realized I can do an indoor version of this too, that will probably be 'part two'. :)

Jerry Ghionis + Roadtrip to Cleveland + Mini How To!

Wow, so this past week was pretty awesome. For my birthday, my loving husband, Fred, treated me to a workshop with world-renowned wedding photographer, Jerry Ghionis, who I believe is the MacGyver of photography heheehe!  He's a genius!  Anyway, I saw him first during The Power of Passion tour with Sandy Puc and was instantly enamored (in a photography sense) with his style, his charisma, and all that he brings to the table when it comes to his friggin' awesome wedding photography.  2 weeks ago I heard about the workshop in Ohio, and next thing I know, I'm traveling in a rented Dodge Charger with my best friend, Grace, whom I am so grateful to for agreeing to come with me on my trip!!  She's my soulfriend, and I love her!  Unfortunately, the hubby couldn't come b/c he's saving up his PTO, but that's cool, we plan to have a trip for his birthday in a month or so! :)

First, a few things about the workshop.  Normally, Jerry doesn't do 1-day workshops, but this was to raise money for Akron's Children's Hospital in collaboration with Skip Cohen who has been nothing but a great help to me when it comes to building my photography business.  He has a podcast with Scott Bourne called "Going Pro" and for you photographers who are just starting out or may even be well established, I think there's something in these free podcasts for everyone... they broadcast 3 times a month and you can find them on iTunes!  Anyway, I commend Skip and Jerry for helping such a great cause and am thankful I got to be a part of it!

Jerry's workshop, while it was only a day, was amazing and definitely worth the 7-8 hour drive!  I already am planning to attend his 5-day workshop next year, I'm hoping there will be one in Philadelphia HEHEHEHE... we shall see!  The things he does with light is amazing... and with posing especially.  The way he is able to bring out certain emotions and expressions is so great, and I hope to be able to do the same as well!  I learned so much.. I didn't take any pics really, moreso video so I can keep watching it over and over again.  It was more about watching him at work and having him explain what hes doing as opposed to us taking pics to build our portfolio.  All the more I just took everything in and thought about what would work for me in terms of what I want to accomplish in my own photography, and new things I'd like to try as well.  Jerry's albums are awesome as well - simple, but the images speak volumes... so he doesn't feel there's a need for all that extra graphic stuff or anything too busy that it would take away from the images themselves.

Anyway, as a result of this, I received complimentary admission for the upcoming Skip's Summer School in Las Vegas, from July 31 to August 3!  I am psyched!!! My fellow photographers, you should definitely go if you can, $279 is really not that much to pay for 3+ days of awesome speakers, top names in the photography industry!

Anyway, here are some images from an evening in Cleveland.

There's also a mini "how to" but I guess it's more about.. what white balance can do to a landscape kind of... See below!


Hmmm... gotta love my hair, this is why I stay behind the camera LOL!


Hundreds of bird were congregating behind the building on the left!


Mini How To! 
To give a sky more blues/purples - you can try setting your camera's white balance to Tungsten (light bulb) instead of cloudy or daylight. 
This is cloudy WB:

This is tungten WB:

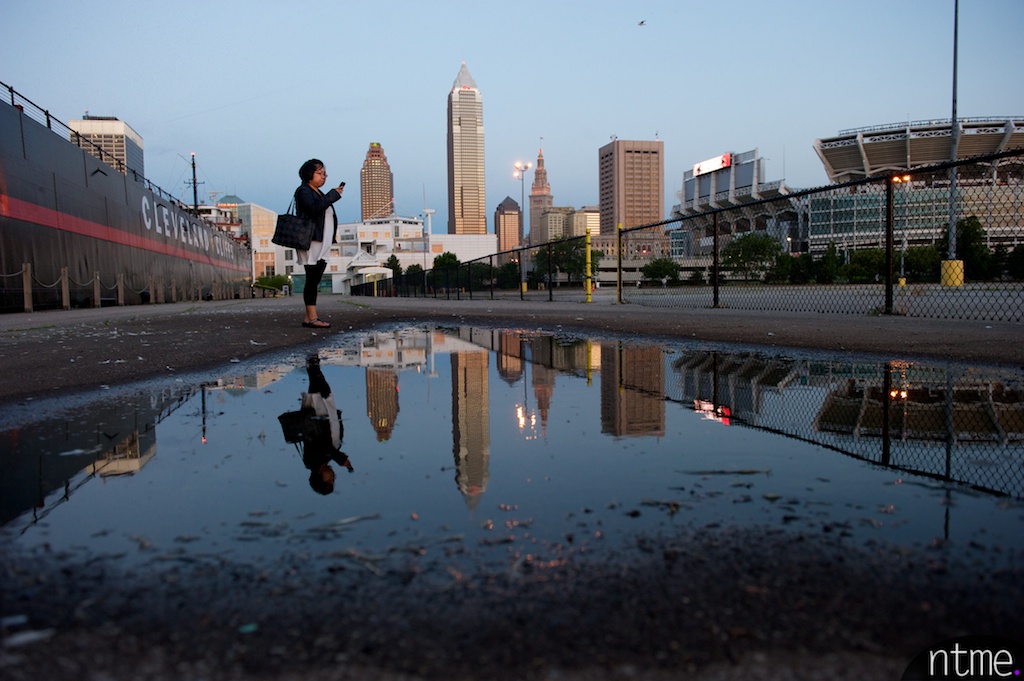
 Big puddles are fun!


Cloudy WB:

Tungsten WB!  So .. it depends on your taste!


Everything was closing around 10pm in Cleveland and we were like - that's lame!  But then we turned a corner and saw this on E. 4th Street!  RANDOM!!